RaceResultExchange
Documentation
Settings
Most settings need to be done in the software itself (Settings button in the navigation panel to the left), some settings directly in Race Result 12.
1. Introduction
Start the Connector by using the desktop icon.
If you are running a demo or trial version, a message box will inform you right away. Otherwise if you have a valid license you will see the details in the top right corner in green.
Upon the first start or whenever you change the event you want to work with go through this settings information.
2. Link Race Result Account and Event (in Connector)
The license is tied to your Race Result customer ID and is therefore already populated. If you are running a demo version, you can enter the customer ID manually. Also the account’s pasword need to be entered.
All events need to be available in your Race Result online account. Still you can check your event out and using it off-line. Tick the apropriate checkbox, and if off-line mode, specify the hostname of the computer running the Race Result Web server.
Click on the three dots button to fetch all events from your account and select the one you want to use.

3. Setup Race Result Event (in Race Result 12)
In order to be able to interact with Race Result, you need to setup distinct Simple API endpoints and link it to the connector. Thes ednpoints are valid only for the given event and need to be created for each event you want to use.
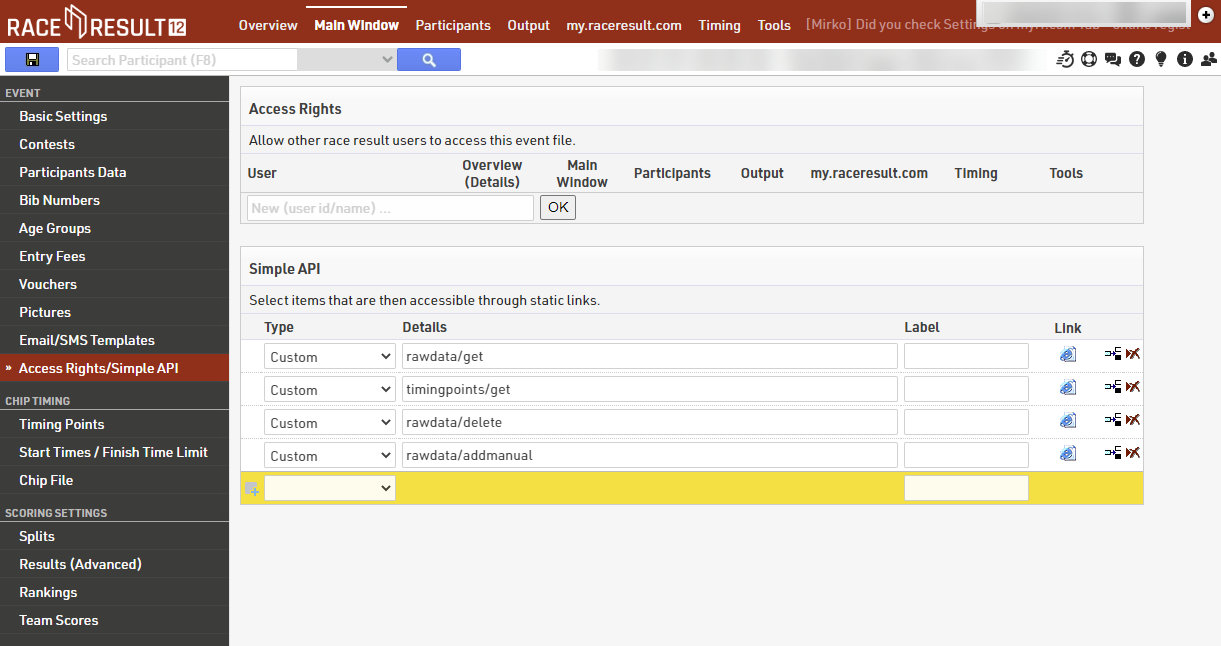
Start Race Result 12 from your online account and go to your event. In Main Window go to Access Rights/Simple API. Now you need to add the following four Simple API rows – all of Type Custom:
- rawdata/get
- rawdata/delete
- rawdata/addmanual
- timingpoints/get
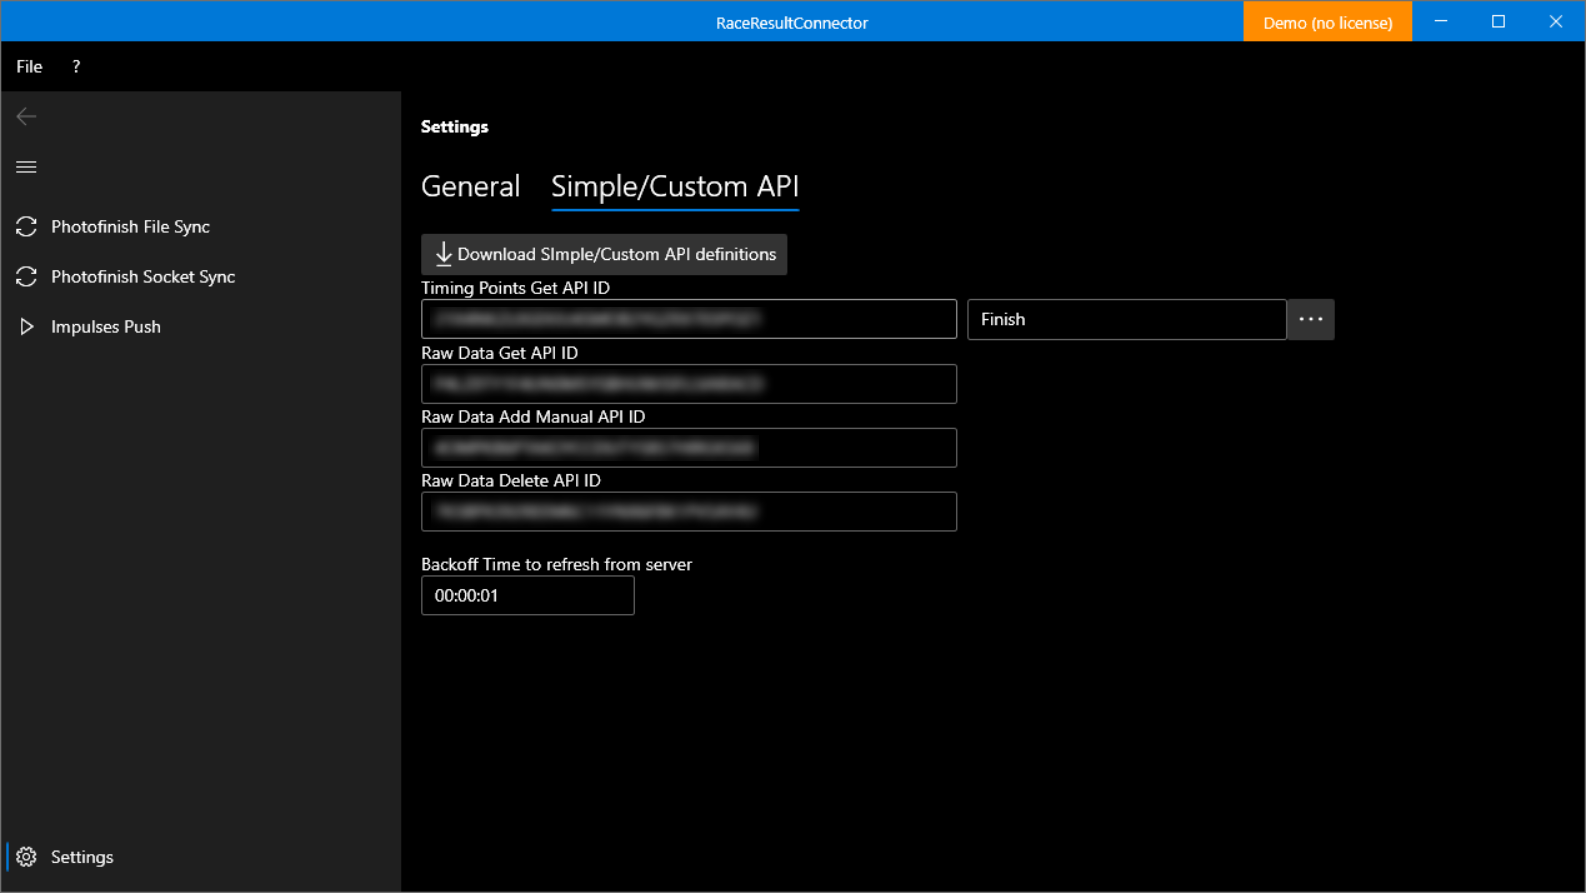
4. Setup Race Result API (in Connector)
Now we need to let the connector know the endpoints we just created. Go to Simple/Custom API tab and click the Download button. Now all endpoints will have some text in it.
Next click on the button with the three dots and select the timing point you want to use.
Photofinish File Sync
1. Introduction
The connector can be linked to a results file on disk or a network share and constantly monitor it for changes. If changes are detected, the Connector can automatically upload the changed data to Race Result event.
Go to Photofinish File Sync in the navigation to the left. This mode stays active as long as you stay on this page.
2. Overview
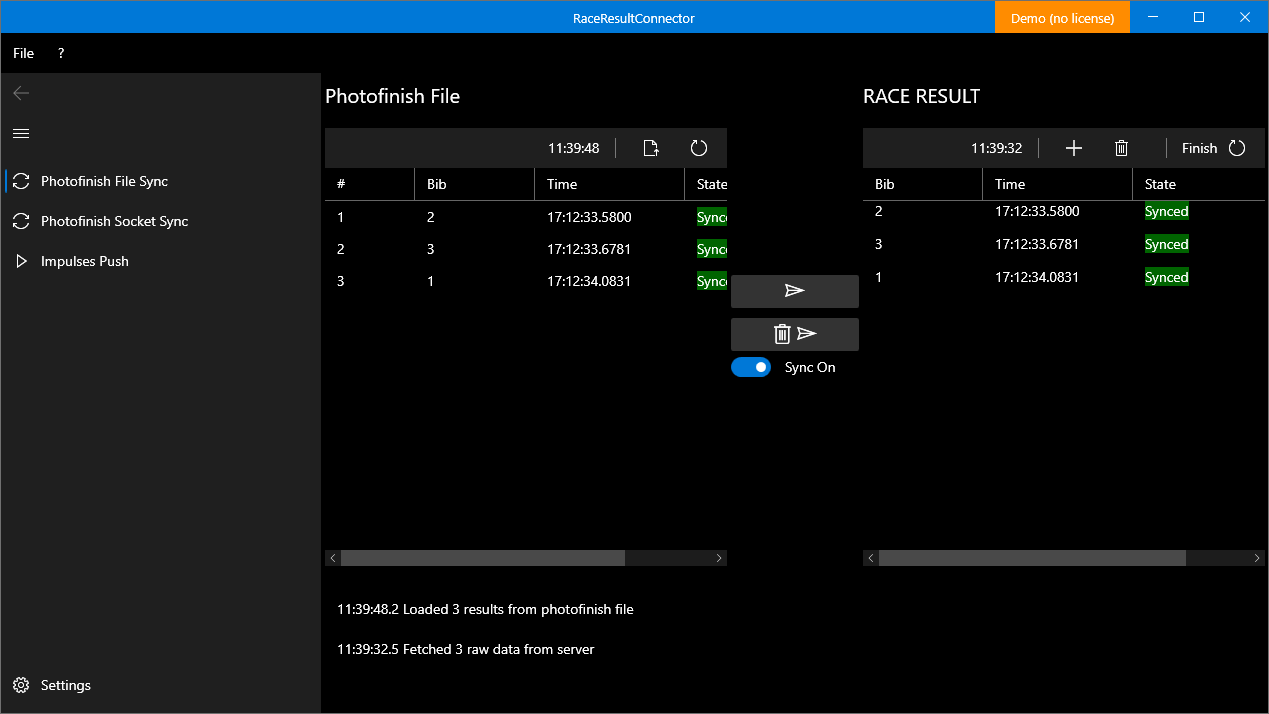
The contents of the photofinish results file are displayed to the left, the current contents of the timing point in Race Result are displayed to the right. On each result row, one can see if the timestamp is synced or not.
3. Walkthrough
- Tick the toggle button and set it to “Sync On” – with this enabled, changes in the photofinish file are automatically synced
- Click on the “Load Photofinish” button and select the results file from the photofinish software
- The contents of the file are automatically pushed to Race Result and you should see the exact same results to the right
If you want to not auto sync you can manually click the “Push Results” buttons in the middle to sync once.
Photofinish Socket Sync
1. Introduction
The connector can receive photofinish results directly via a socket (and not tedious files on network shares) by ALGE-Timing OptiC3.NET software or our own Photofinish software.
Go to Photofinish Socket Sync in the navigation to the left. This mode stays active as long as you stay on this page
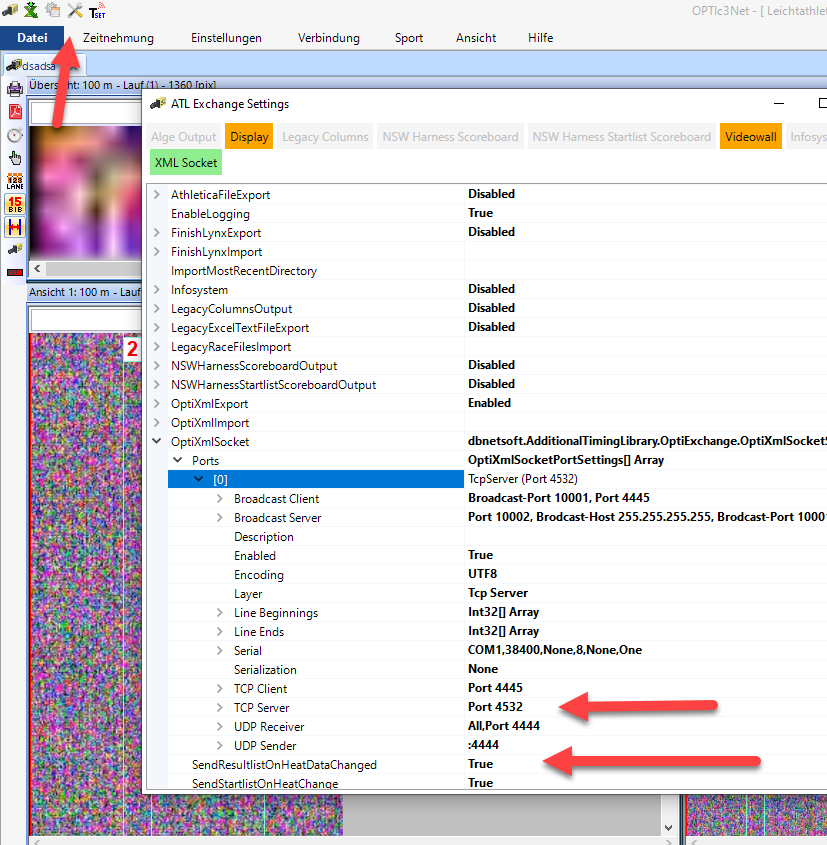
2. Setup ALGE-Timing OptiC3.NET
Go to the ATL Settings in top icon menu and open OptiXmlSocket. There you can specifiy the TCP port or leave the default (4532). Make sure to have SendResultlistOnHeatDataChanged enabled, as otherwise results are only sent when pushing them manually.
3. Setup Connector
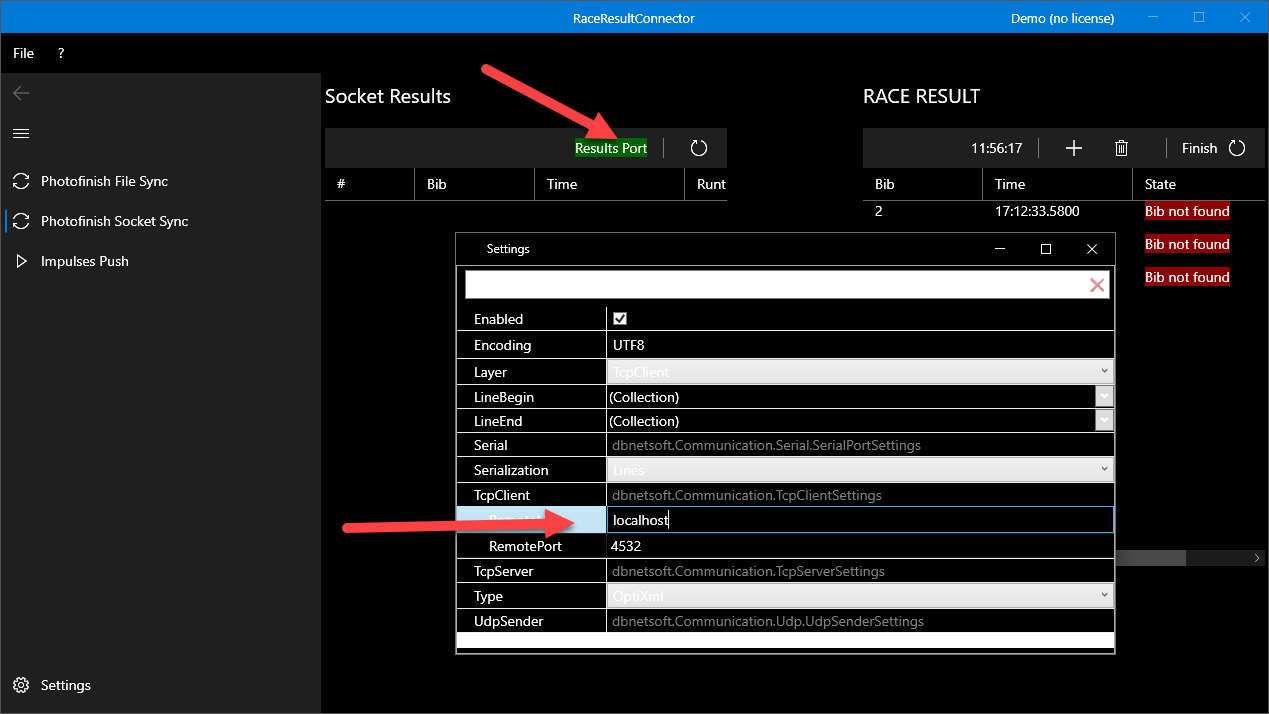
Right-Click on the Results Port button and select Settings. Expand the TcpClient section and enter the IP of the computer running photofinish software (or localhost if same computer). Leave RemotePort at the default (4532) or change to the same value set in the photofinish software.
4. Walkthrough
- Make sure that the Connector is connected to the Photofinish software – the Results Port button must be green.
- Set the Sync toggle to Sync On
- Decide whether you want to sync finish time-of-day or net times (with FinishLynx it does not make a difference as only ALGE products output both time-of-day and net time)
- In the photofinish software, evaluate a bib number or change results manually.
- You should now see the results instantly on the left-hand side
Request a Feature or Submit a Bug
We are happy to hear from you about features that are interesting to you and maybe others as well.
Also please let us know about any bugs or problems you encounter during operations.
